How to install n8n in 10 minutes: A step-by-step guide


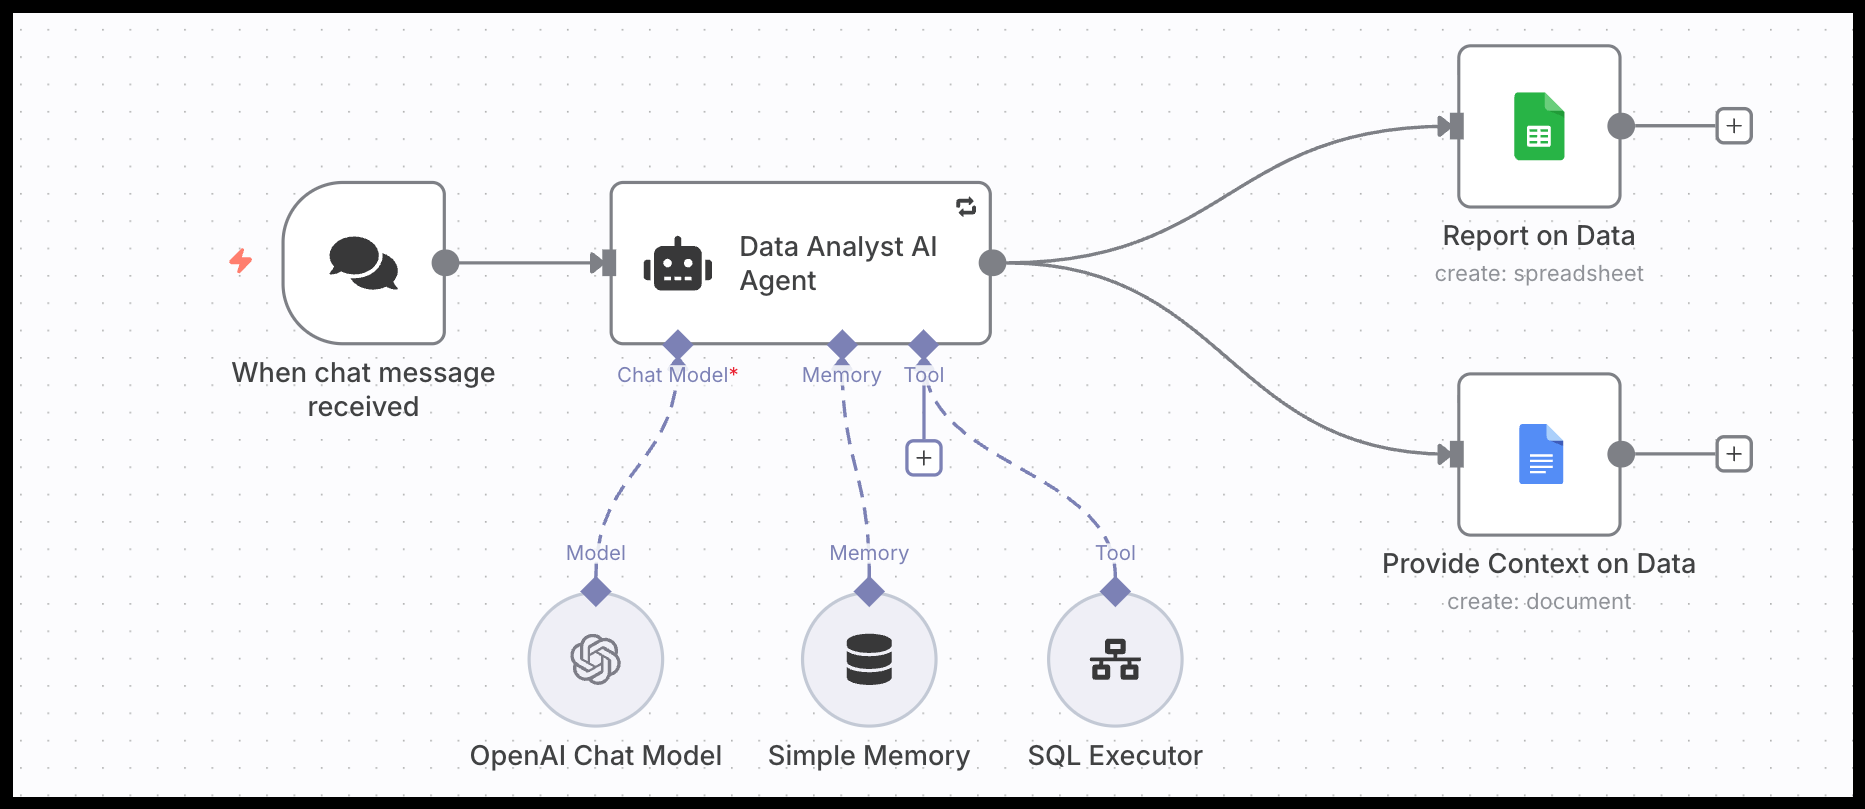
Mondays always used to start painfully. It involved at least three hours of manually pulling performance data from Google Ads, Facebook Ads, and our backend, to write weekly reports to C-level. A very repetitive and draining task. Sound familiar?
That all changed when we started using n8n. Now we're able to schedule data collection through BigQuery with SQL Queries, and let another Agent connected to Open AI's API automatically build a performance narrative around it in a Google Doc and Sheet.
This is just one of the endless examples how n8n can automate workflows and enhance your performance marketing with AI agents.
This guide is here to help you install n8n so you can get straight to building powerful automation workflows on the platform. The best thing about n8n? You can use it completely free!
So, what exactly is n8n?
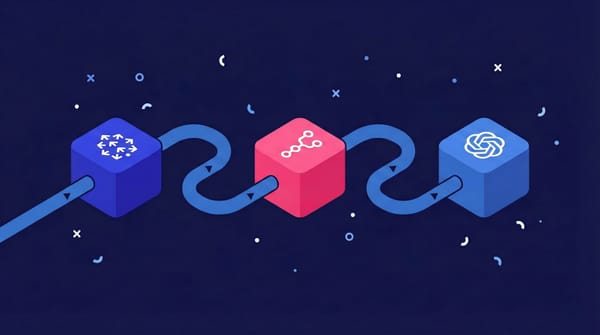
Think of n8n as the ultimate glue for all your marketing tools. It lets you visually connect different APIs and workflows to pass data between them and automate just about anything. The real power of n8n is that you can seamlessly plug in LLMs (like ChatGPT or Gemini) to analyze data, generate content, and automate complex tasks within your automation workflows.
Your options: Cloud vs. self-hosted n8n
You've got two main ways to get started. Don't overthink this part.
In this guide we'll explain how you can use the free, self-hosted n8n version. It's the perfect sandbox. Once you start scaling your workflows within your team, you can always decide to move to the cloud version later.
Let's get started: n8n installation guide
We’ll set up n8n locally using Docker. If you choose the cloud version instead, you don’t need to install anything. You can use n8n directly in your browser.
Step 1: Install Docker Desktop
First things first, you need to install Docker Desktop. Once it's downloaded and installed, open the application. It might take a minute or two to start up. You'll know it's ready when the little whale icon in your menu bar (macOS) or system tray (Windows) is steady.
Step 2: Create a folder for your n8n data
Your workflows and credentials need a safe place to live on your computer. This step ensures your data is saved even if you stop or remove the Docker container.
Create a new, empty folder somewhere easy to find. For this guide, let's create it on your Desktop and name it n8n_data.
Step 3: Run the magic command
Now it's time to bring n8n to life.
Before you copy the command, you need to create an Encryption Key. This is a secret password that n8n uses to protect your sensitive data (like API keys).
Action Required: Create a long, random, and secure string of at least 32 characters. You can use a password generator for this. For example:mySuperSecretPasswordForN8nIsVeryLong_123!. Replace"YOUR_SECRET_ENCRYPTION_KEY"in the command below with the string you just created.
Step 4: Run the magic command
Now, open your terminal.
- On Mac, search for "Terminal."
Copy the entire block of code below, paste it into your terminal, and hit Enter.
docker run -it --rm \
  --name n8n \
  -p 5678:5678 \
  -v ~/Desktop/n8n_data:/home/node/.n8n \
  -e N8N_ENCRYPTION_KEY="YOUR_SECRET_ENCRYPTION_KEY" \
  n8nio/n8n
- On Windows, search for "PowerShell."
Important: In the command below, replace <YourUsername> with your actual user folder name (e.g., C:\Users\Maria\Desktop...).
docker run -it --rm `
  --name n8n `
  -p 5678:5678 `
  -v "C:\Users\<YourUsername>\Desktop\n8n_data:/home/node/.n8n" `
  -e N8N_ENCRYPTION_KEY="YOUR_SECRET_ENCRYPTION_KEY" `
  n8nio/n8n
Your terminal will now start working. It will download the n8n image (this only happens the first time) and then start the service.
Wait for the terminal to spit out a bunch of text. The last line should say something like Editor is now available on http://localhost:5678/. That's your cue!
Step 5: Time to log in
Open your web browser and go to: http://localhost:5678 (replace with your personalized link).
You'll see the n8n setup screen. Follow the steps to create your account.
And just like that, you're in. Welcome to your new automation canvas.
You're in! Now what?
Congrats, you did the hard part! Now that your self-hosted n8n is running, here are a few things I wish I'd known when I first started.
- Build something easy: Seriously. Your first workflow shouldn't be your magnum opus. Just drag in a Manual Trigger node and connect it to a Set node. Write "hello world" in the Set node and run it. This will teach you the absolute basics of how data flows in n8n.
- Use the credentials vault: On the left-hand menu, find "Credentials" and store your keys there. Here you can set up all your API connections, like Google Ads, Google Drive, Slack and many more. It's secure and lets you reuse them easily.
- Get inspired: If you're not sure what to build, check out the workflow library on the n8n website. You can find hundreds of pre-built templates for everything from SEO analysis to social media posting. Or watch the YouTube video below to start building your first Workflows in n8n.
You've just installed one of the most powerful tools in modern marketing. Now, let's start building your first automation workflow to understand how n8n works!
N8n foundations: A marketer's guide to AI workflow automation