How to build a RAG knowledge base with n8n and Pinecone: A step-by-step guide

In our previous article, we covered the "what" and "why" of Retrieval-Augmented Generation (RAG). Now, it's time to get practical and build one. This is part 1 of our hands-on series, focused on building a knowledge base your AI agents can utilise.
The goal is simple: by the end of this tutorial, you will have a functional n8n workflow that automatically populates a Pinecone vector database (RAG) with your own content. This creates the foundation for powerful, context-aware AI applications.
For this tutorial, we’ll use an example straight from our own workflow. Our website runs on Ghost, so we use the “Ghost node” in n8n to automatically pull all our published posts and send them to a Pinecone vector database. This ensures that our other AI agents always have access to the most up-to-date information from our blog — helping with everything from writing new articles to refining our content strategy and powering other automations.
The input source for this RAG system is highly flexible. For example, you can substitute the Ghost and Code node with a Google Drive node to use documents as a source, or an HTTP Request node to fetch data from any API.

The complete n8n workflow to seed your Pinecone database
You can get started immediately by copying the entire JSON below and importing it directly into your n8n canvas. All you need to do is switch the credentials (Pinecone and Open AI) and adjust the workflow to your own needs.
Get started instantly: Copy the full JSON workflow from the link and paste it directly into n8n to begin.
Prerequisites: What you'll need
Before we start, make sure you have the following ready:
- An n8n instance: This can be a self-hosted version or an n8n cloud account.
- A Pinecone account: You will need your API key and index name.
- An OpenAI account: You will need an API key to generate the text embeddings.
- Knowledge Base: for the purpose of this tutorial, we're using our Ghost Content API. However, you can easily modify the workflow to connect to any source you want to build a RAG system for.
Setting up your Pinecone Index
Your Pinecone index is the vector database that will store your knowledge. It's crucial to set it up correctly before running your n8n workflow.
- Create an Index: In your Pinecone dashboard, give your index a name (e.g.,
my-knowledge-base). - Set the Dimensions: This is the most critical step. The number of dimensions for your index must exactly match the output dimensions of the embedding model you use in n8n.
For example:
- OpenAI's
text-embedding-3-largemodel produces vectors with 3072 dimensions. - OpenAI's
text-embedding-3-smallmodel produces vectors with 1536 dimensions. - The
n8n-nodes-base.embeddingsOpenAinode in the provided workflow defaults to 1024, which you must ensure matches your model choice.
Why is this important? Think of it like a puzzle. The embedding model creates a puzzle piece of a specific size (the vector). The Pinecone index is the puzzle board with slots of a specific size. If the piece and the slot aren't the exact same size, they won't fit, and the workflow will fail.
- Choose a Metric: For most use cases with OpenAI embeddings,
Cosineis the recommended similarity metric. - Create Index: Click "Create Index". Now you're ready to connect it to n8n.
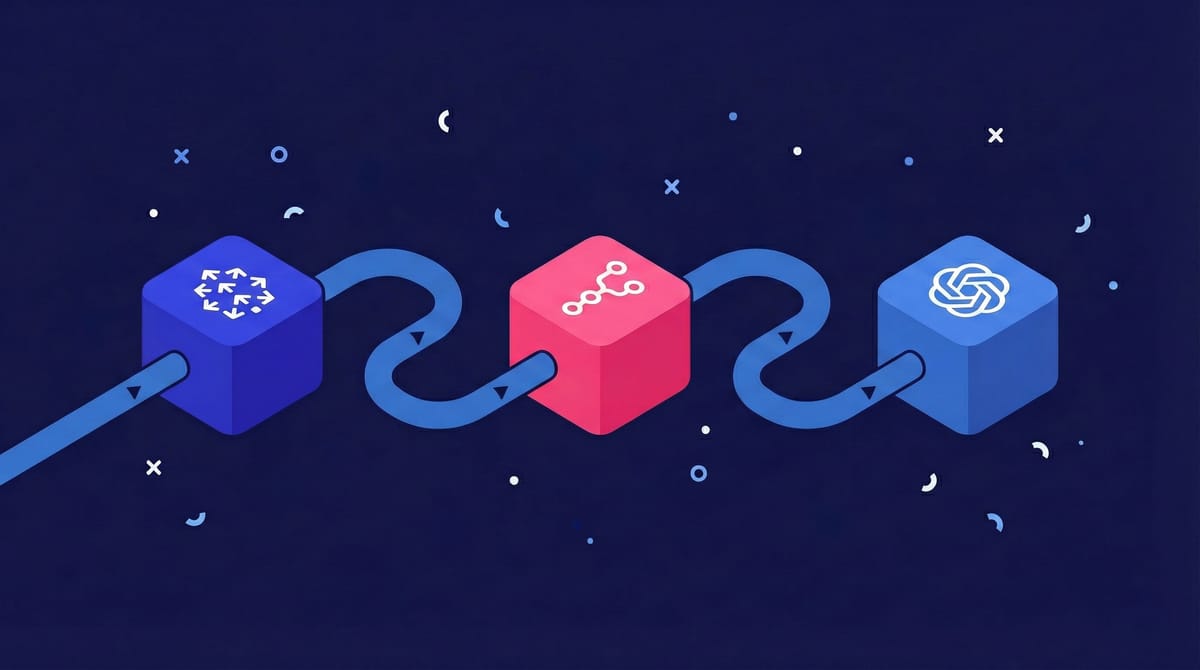
The step-by-step breakdown of the workflow
This workflow fetches content, cleans it, converts it into numerical representations (embeddings), and finally stores it in Pinecone. Let's break down each node.
1. Daily Trigger: Automating the updates
Our workflow begins with a 'Daily Trigger' node. This automatically runs the entire process once a day to check for and add new content. You can change this to a manual trigger if you prefer to update the knowledge base on your own schedule.
2. Get Ghost CMS Blogs: Fetching the data source
This is where we define our data source. The example uses the 'Ghost' node to fetch posts that have been updated in the last day. This is an efficient way to keep the database synced without reprocessing every single article each time.
3. HTML to Plain Text: Preparing the content
Raw content from an API often includes HTML tags and other formatting. These are not useful for an AI model. This 'Code' node executes a small JavaScript snippet to clean up the content, ensuring we only send pure text to the embedding model.
If not relevant in your case simply remove or replace this node.
4. The Pinecone Node in n8n: Chunking and Embedding
This is the core step for adding docs to the RAG. Search for the Pinecone Vector Store Node: click on "Add documents to vector store" and add the following ot this node:
- Embeddings OpenAI: This takes each text chunk and sends it to OpenAI's API to be converted into a vector embedding.❗Important here is to use the same embeddings as you've set in Pinecone (see previous step).
- Default Data Loader: This takes the text chunks and attaches our important metadata (like the post ID, title, slug, and creation date) to each one. You can customize this to your needs.
- Recursive Character Text Splitter: A single blog post is too long to be embedded effectively. This node breaks the text into smaller, overlapping "chunks." You can adjust the character splitting or set it on "simple text splitting" which splits every 1000 characters with a 200 character overlap.

Making it your own: Swapping the data source
The strength of this n8n workflow is its modularity. While we used our blog as the data source, you can easily replace the 'Get Ghost CMS Blogs' node with any other data source. The rest of the workflow (cleaning, embedding, and upserting) remains exactly the same.
Here are a few common alternatives:
- Google Drive: Use the Google Drive node to read text from documents or spreadsheets.
- Notion: Connect to a Notion database to pull pages and content.
- Confluence: Perfect for syncing internal wikis and project documentation, so your AI can reference up-to-date internal knowledge.
- GitHub: Pull information from README files, code comments, or documentation to help your AI understand technical context.
- Slack: Extract insights or FAQs from team conversations to make your AI more aligned with how your team actually communicates.
Conclusion and next steps
You now have a fully automated n8n workflow that can populate a RAG knowledge base from the data source of your choice. You have successfully completed the first major step in building a powerful marketing intelligence tool.
The next step is to use this knowledge base for your AI Marketing Automation Systems.
See this RAG in Action: Building a context-aware content generation agent with n8n and RAG.